Home
Components
Hooks
Apps
MCP Server
Guides
Home
Overview
Getting Started
Core Concepts
Performance
Theme Configuration
Components
Typography
Data Display
Disclosure
Others
MCP Server
VS Code Extensions
gluestack VS Code Extension
is specially crafted to streamline your development process when using the gluestack-ui v3. It provides a set of powerful features to accelerate your workflow and improve efficiency.
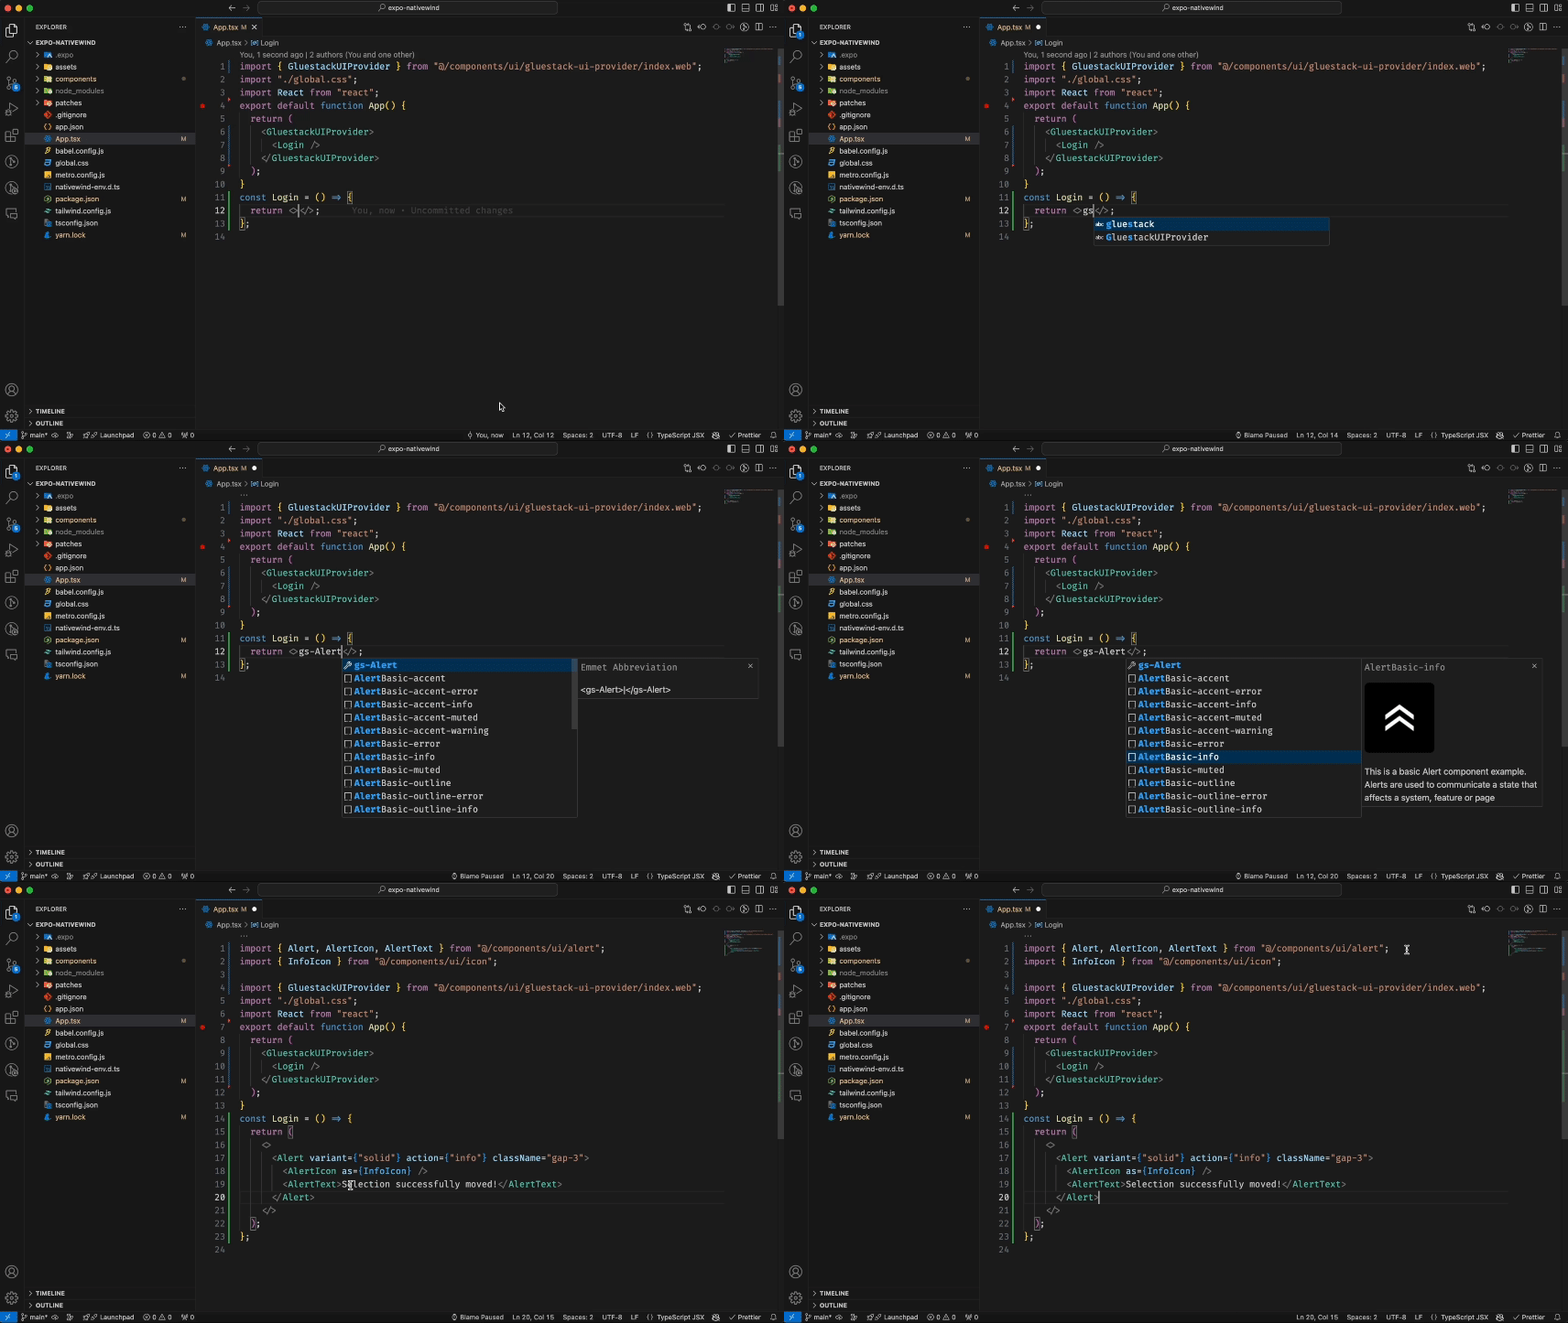
These extensions provide gluestack snippets, which are shorthand for commonly used gluestack-ui components.
All snippets start with the prefix gs-
and are followed by the name of the desired component.

Features
Component Snippets
Insert gluestack-ui components into your code with shorthand snippets. Each snippet starts with the prefixgs-
, followed by the name of the desired component. This allows you to quickly generate component code without the need for manual typing.
Additional Recipes
Collection of predefined code templates, known as "recipes" to cover a wide range of scenarios and save you time by providing ready-to-use code structures.Automatic Imports
Streamline your workflow with automated import statements. The extension intelligently handles the import process, ensuring that the necessary components and modules are included in your code.Dynamic Hooks & Variables
Tailor your application's functionality specific requirements using dynamic hooks and variables. These features provide adaptability, allowing customization to suit the needs of your project.Getting Started
To get started with the gluestack VS Code Extension, follow these steps:- Step 2:Open a project in Visual Studio Code that usesgluestack-ui v3.
- Step 3:Start using the extension by accessing the snippets, recipes, and automatic import features described above.
Example Usage
Component Snippets
To insert a gluestack-ui component, simply typegs-
followed by the name of the desired component. This will give you suggestions. For example, to add a button, type gs-ButtonBasic
and press Tab
or Enter
to generate the code. It will also have all the variants combinations with Buttons
<Button action="primary" variant="solid" size="lg" isDisabled>
  <ButtonText>Button</ButtonText>
</Button>
Additional Recipes
Access predefined code templates by using the available recipes. For instance, to create a KeyboardAvoidingView with Actionsheet, typegs-ActionsheetWithKeyboardAvoidingView
and press Tab
to generate the code.
Automatic Imports
As you start using gluestack components, the extension will automatically handle the necessary imports for you. There's no need to manually add import statements; the extension does it for you.Dynamic Hooks & Variables
Utilize dynamic hooks and variables to enhance the functionality of your gluestack application. These features empower you to adapt and customize your code to meet the specific requirements of your project.Changing gluestack-ui versions.
- Automatic Project Type Detection: The extension automatically identifies your project type by analyzing yourtailwind.configfile.
- Manual Version Override: You can manually select the snippet version you prefer.
How to Manually Override Snippet Version?
To manually override the snippet version:- Step 1:Open the command palette by pressingCommand + Shift + P(on Mac) orCtrl + Shift + P(on Windows/Linux).
- Step 2:TypeSelect gluestack-ui versionand press Enter.
- Step 3:Choose the desired version from the options:
- v1 - @gluestack-ui/themed
- v2 - gluestack-ui with NativeWind
Edit this page on GitHub